Development, Showcase
Wheel Swap Guide (Vancity Diecast Wheels)
Jan
This wheel swap guide features Vancity Diecast’s trim-to-fit axle system. This axle system was designed to make wheel swapping even easier than ever before! This new system gives wheel swaps a more professional looking finish, while minimizing the amount of time required and the number of tools needed. All of Vancity Diecast’s manufactured wheels utilize this trim-to-fit system.
This wheel swap guide is catered towards beginners or people who want to do a drill-less wheel swap. There are a bunch of good cars out there with factory paint and details which can be left alone.
For seasoned customizers, taking the car apart is optional and recommended if you are looking to do a full custom consisting of paint/decals/interior detailing/etc. For castings that have fenders or quarter panels covering or partially covering the wheels, drilling is required.
Materials required (links provided!):
– side cutting pliers (small ones make it easy to take off original wheels)
– diagonal cutting pliers
– nail polish remover/acetone and clean brushes (if you are planning on preserving the original packaging)
– strong glue (to hold wheels onto the axle)
– cloth/rag (optional: only required for covering original wheels while breaking them off)
– eye protection (recommended)
– extra axles are available for purchase here!
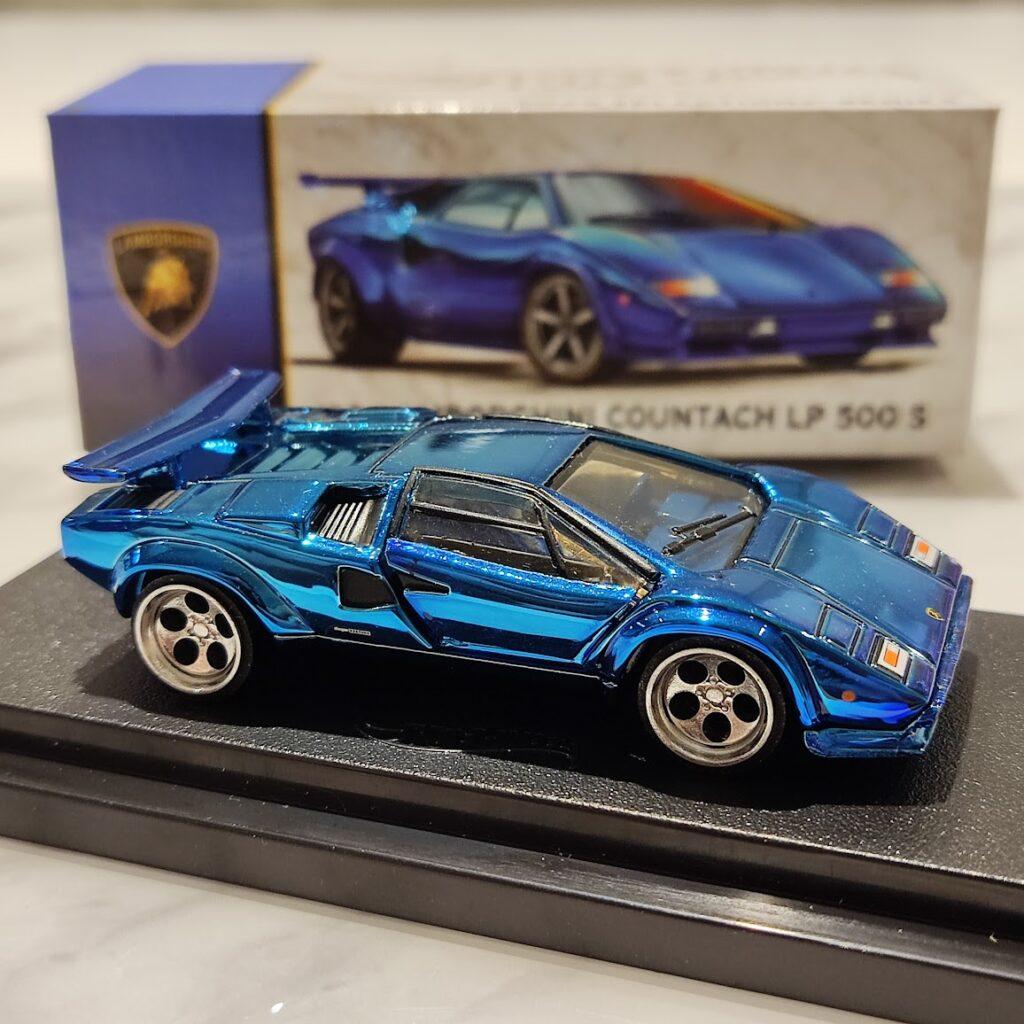
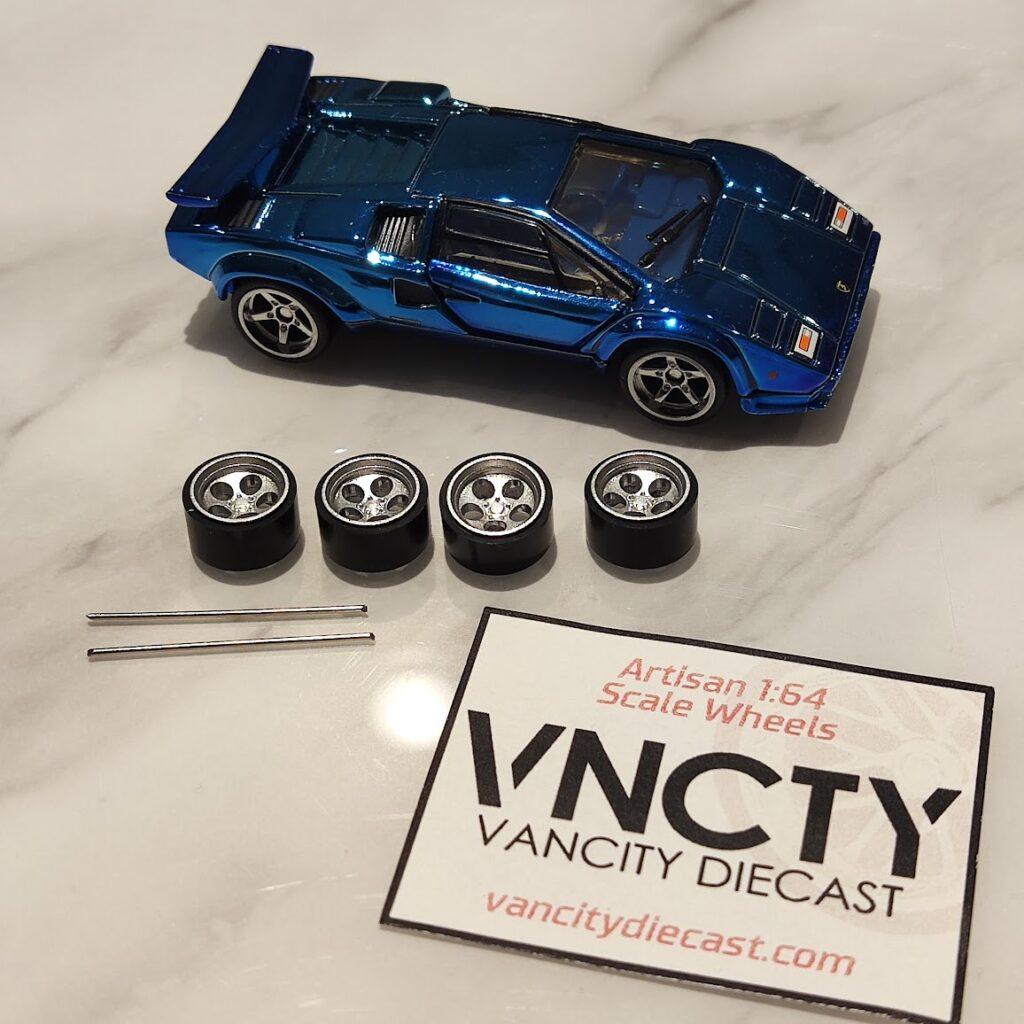
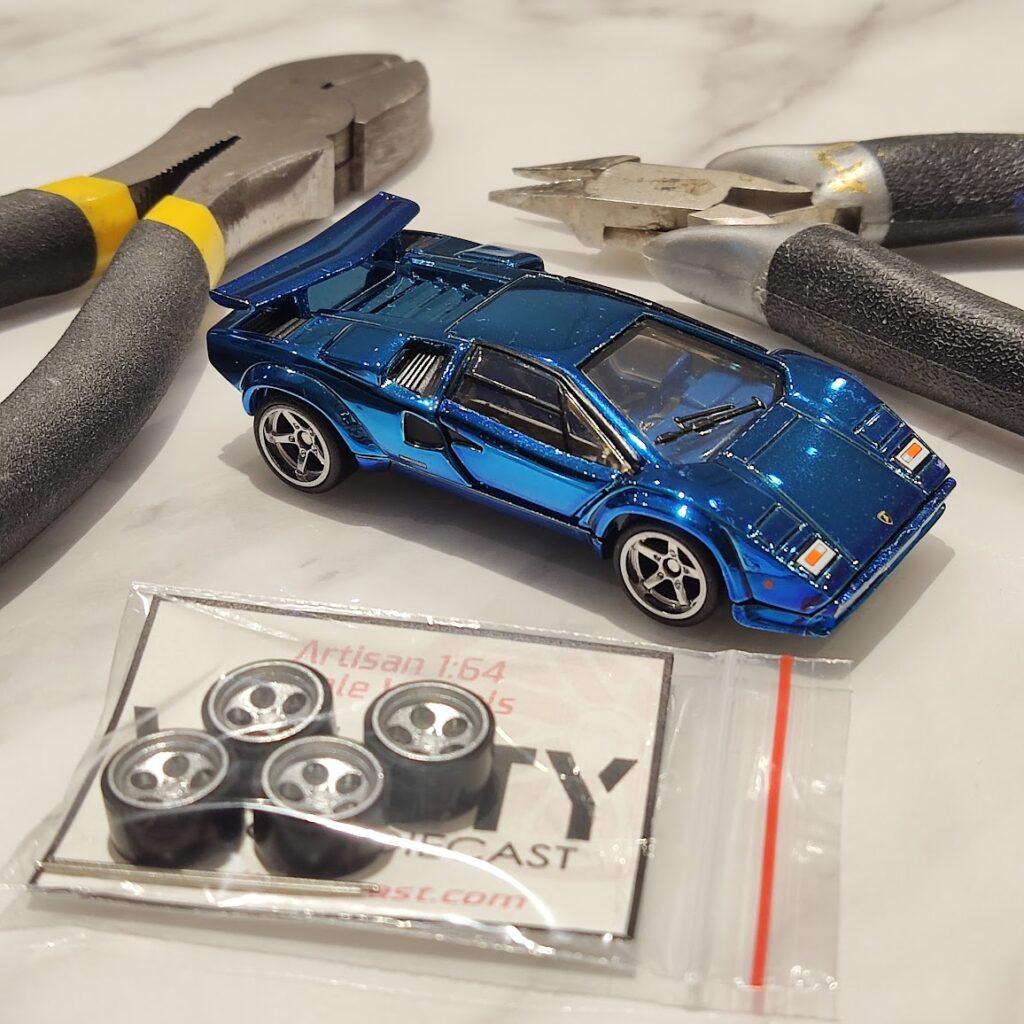
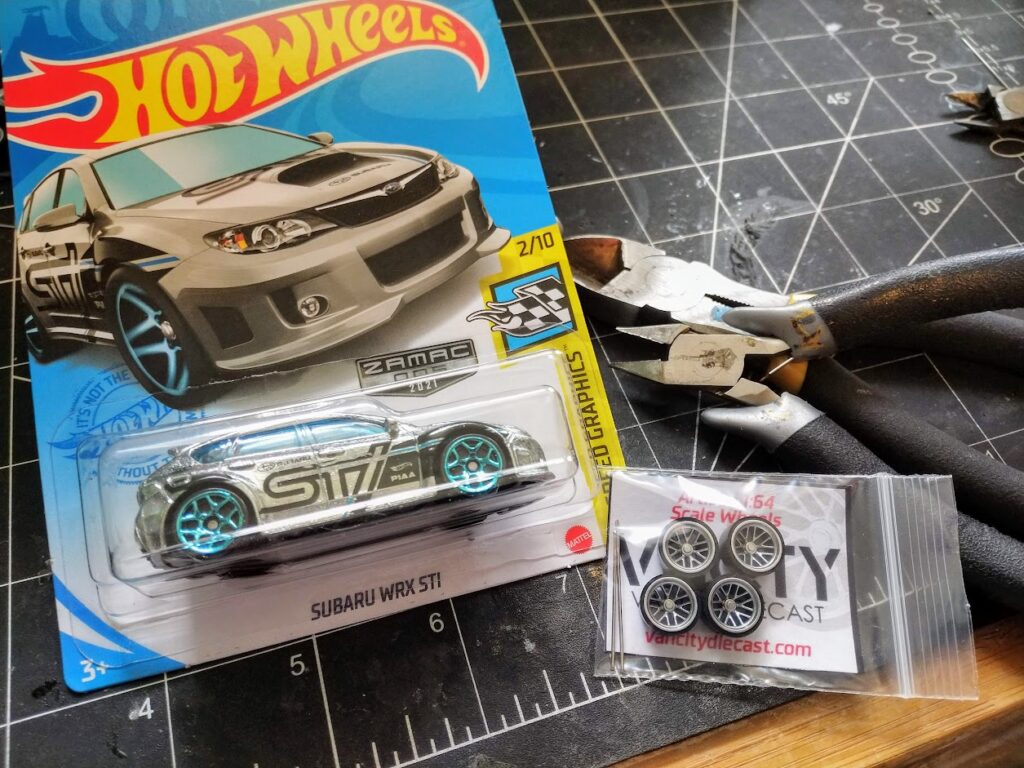
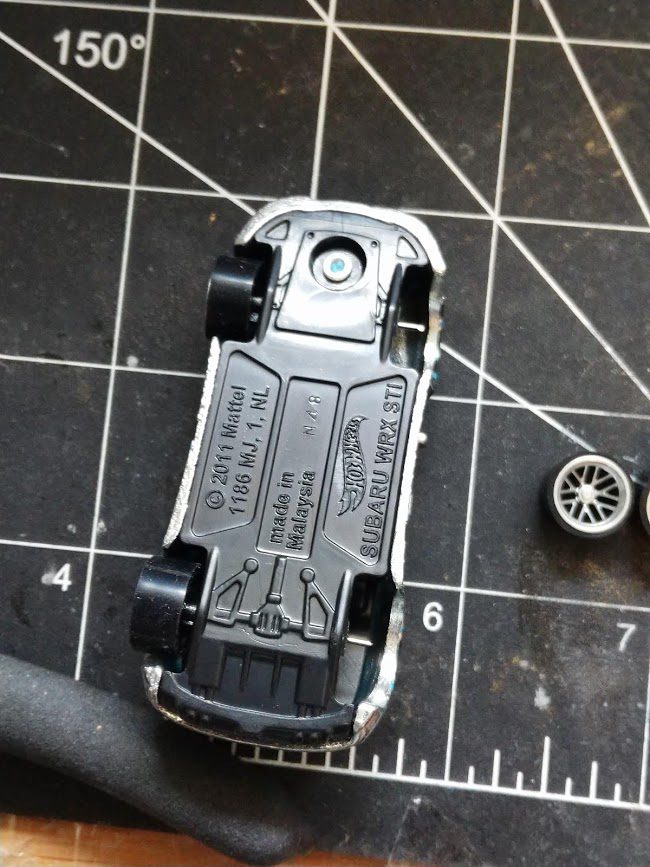
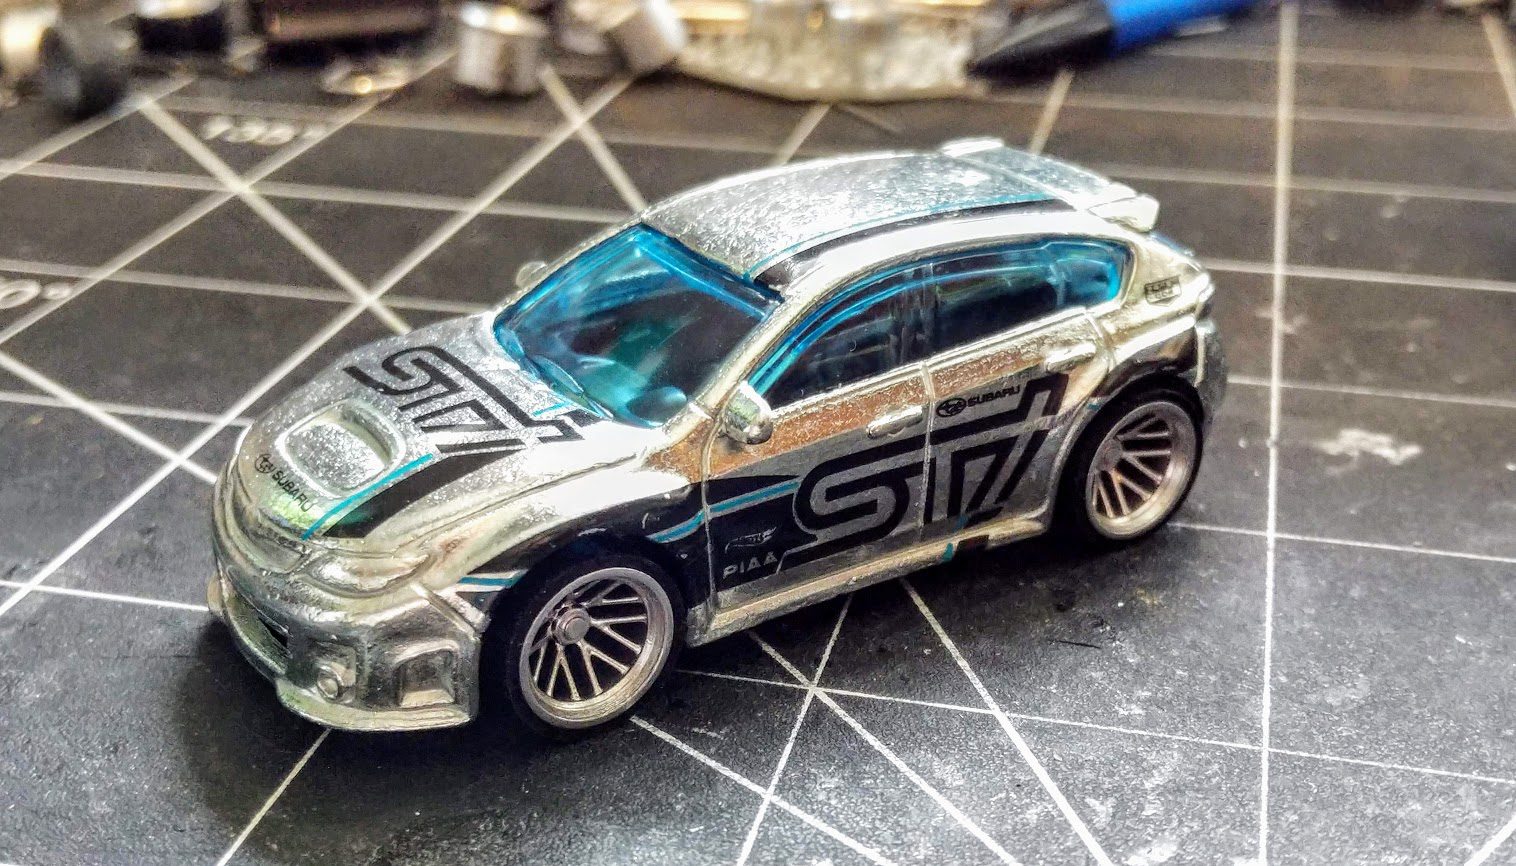
For this wheel swap guide, we will be featuring our “Rival” wheels with press-in axles paired up with a Zamac Subaru WRX STI!
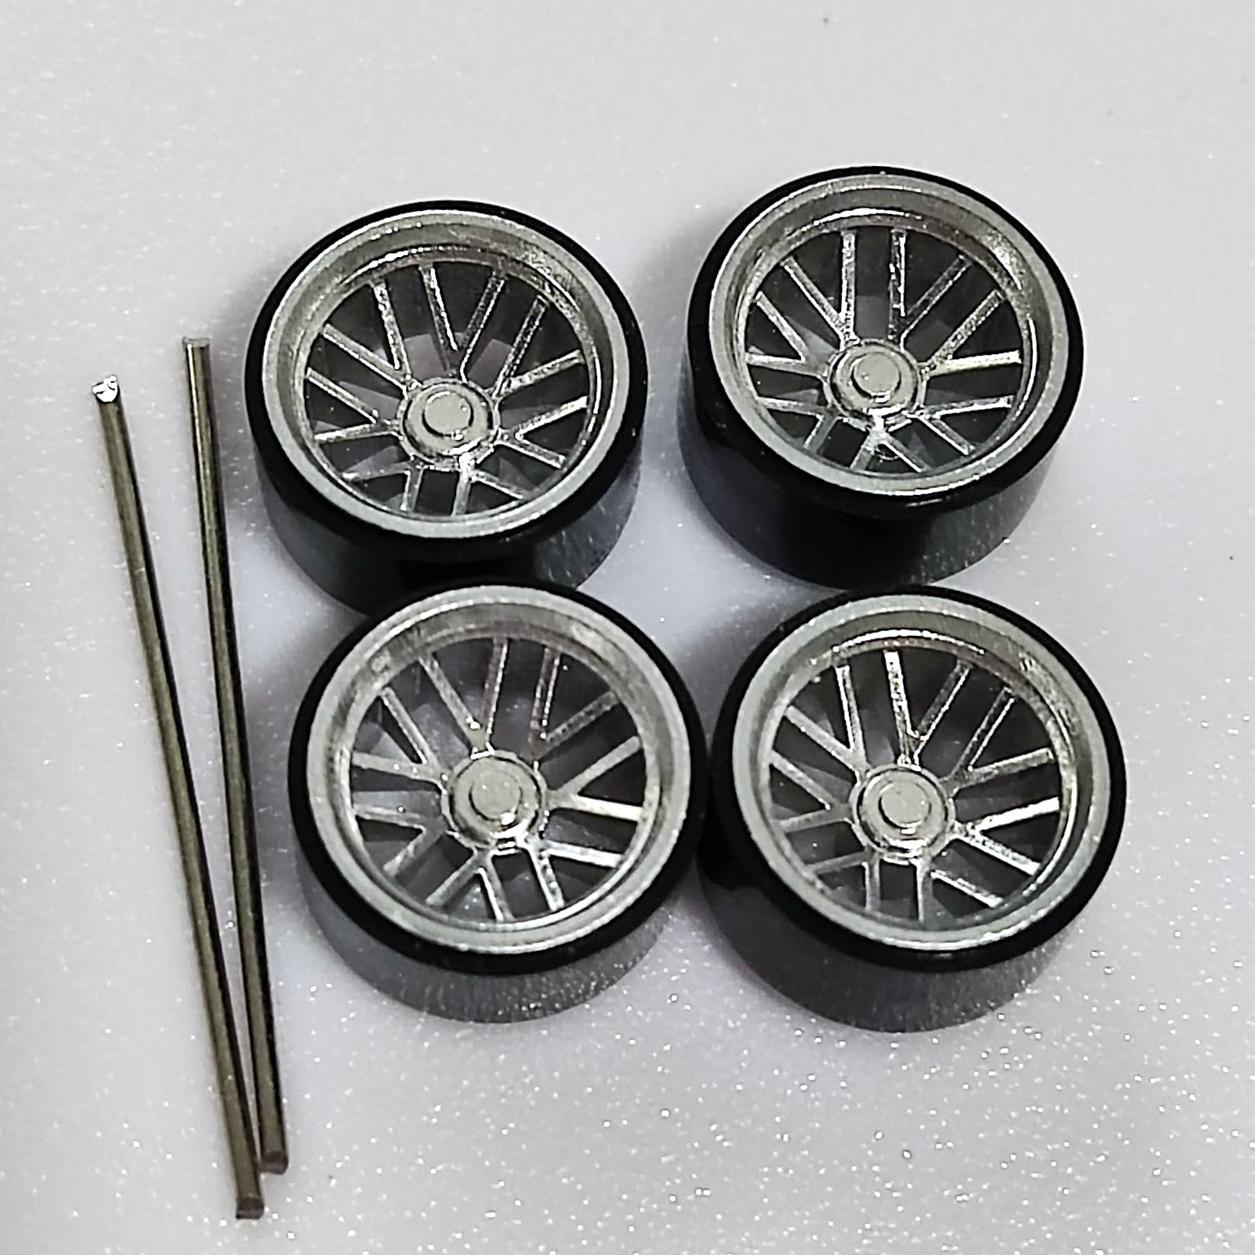
All Vancity Diecast wheel sets include removable rubber tires and two trim-to-fit axles.
Wheels are available in many different sizing options as well as color options.
Our most popular color choices are silver or chromium (shinier finish)
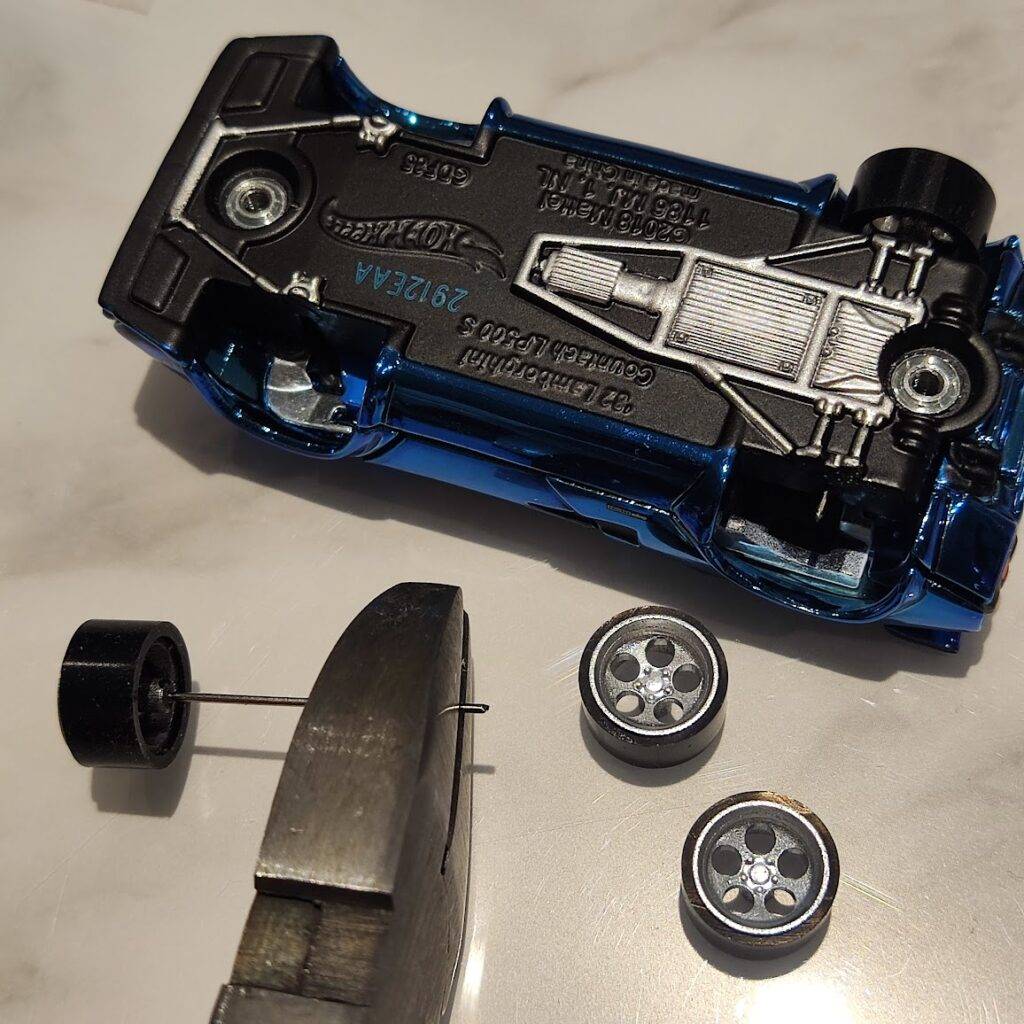
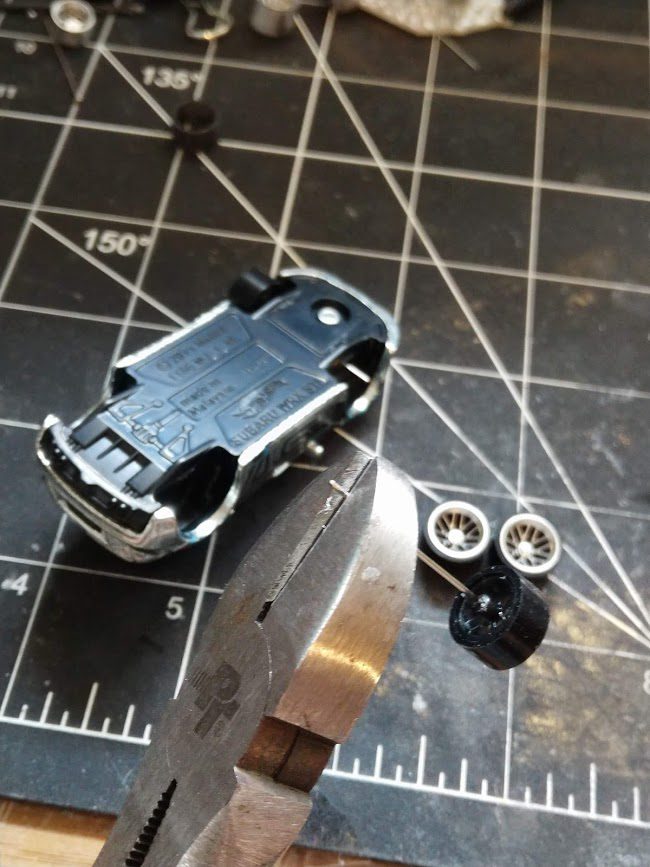
We are using two sizes of pliers – a standard size side-cutter which will be used to trim axles down, and a smaller one which is meant to go in-between the body of the car and the original wheels to snip them off. If you are using small side-cutting pliers, please ensure they are very high quality and sturdy to break through stainless steel otherwise your pliers will be damaged.

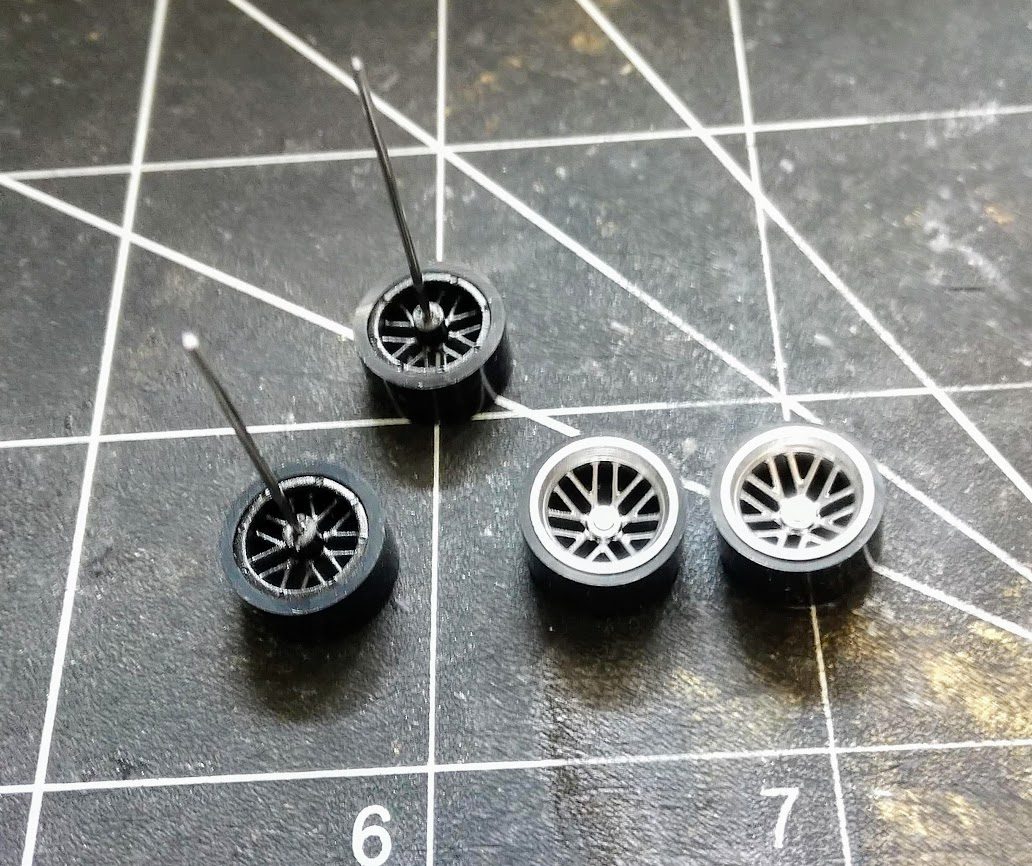
With each set of wheels, there are two axles included. The rubber tires are already attached to the wheels and can be removed if you are planning on painting the wheels. If you are planning on painting the wheels, you can simply use a toothpick to hold the wheels up while pegging them on a piece of foam or cardboard.
If you want to take the car out of the original packaging and want to preserve the card without tearing it, use acetone (or clear nail polish remover) on a clean brush and apply it to the backside of the card where the bottom and sides of the plastic blister attach. When the card is saturated enough, the adhesive holding the plastic blister will re-liquify long enough for you to slide the car out of the packaging.
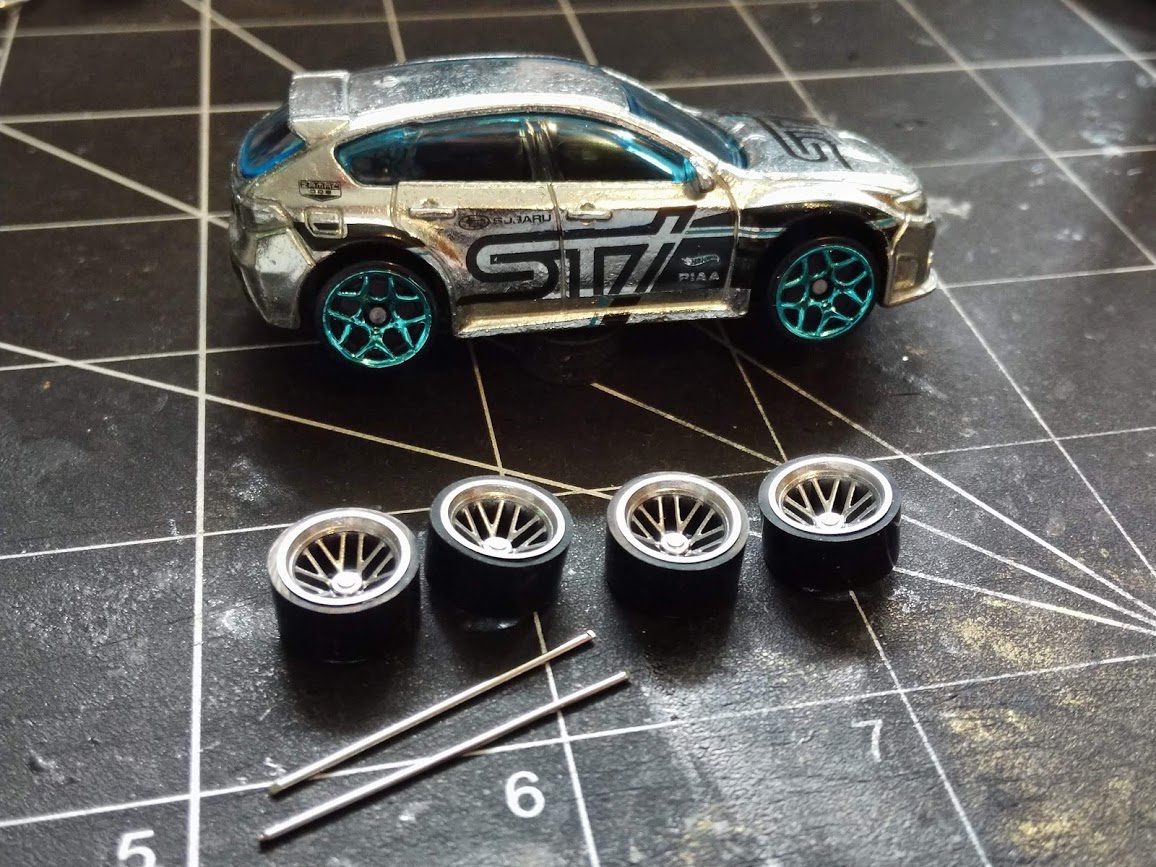
To begin the wheel swapping process, simply attach each axle to the backside of a wheel. Please add a bit of glue on the end of the axle. Wheels are designed with between 2.5 to 3.5mm of space for the axles to slide in. Do not force axles in with excessive pressure otherwise you risk hurting yourself and the wheel breaking! Glue will be required to hold the wheels onto the axle without falling off. We use gorilla glue! You can also substitute glue for adhesive putties as well.
Once the wheels are ready, it is time to prepare the casting for the wheel swap! Use the side cutter pliers to break off the original wheels. We used our smaller pliers which can wedge between the base of the car and the original wheels. Using moderate force we are able to snap the original stainless steel axles off. If you only have standard size side cutting pliers, you can simply break off the original plastic wheel which gives the standard pliers access to the axle portion, then break that off.
After the original axles and plastic wheels are broken off, you can throw them away if they are no longer necessary. Eye protection is recommended, as wheels/original axles can shoot across the room under force! We recommend you use a rag/cloth and cover both wheels as you are trying to break the original axles off. For cars that have fenders partially covering the wheels, it may be necessary to drill out the base apart to swap the wheels.
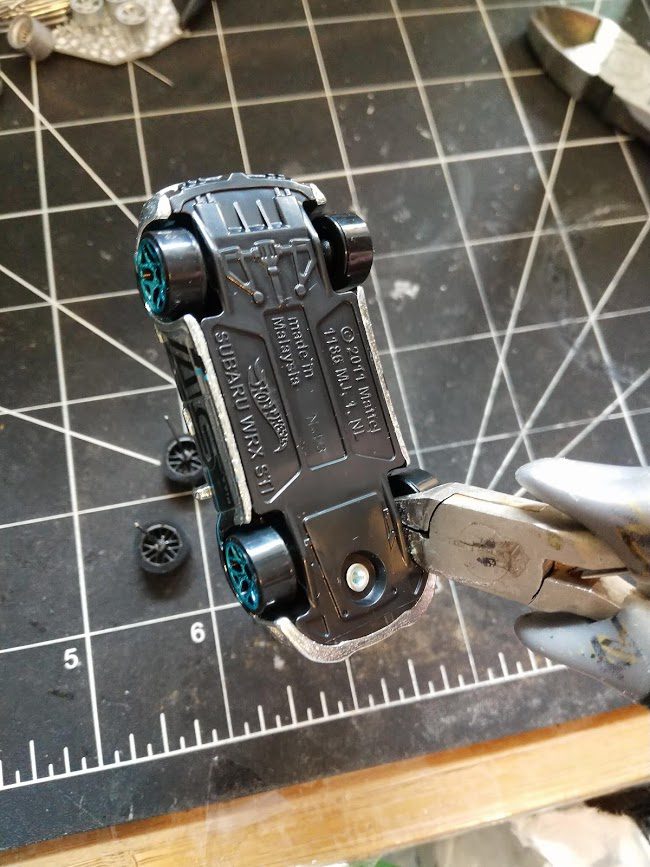
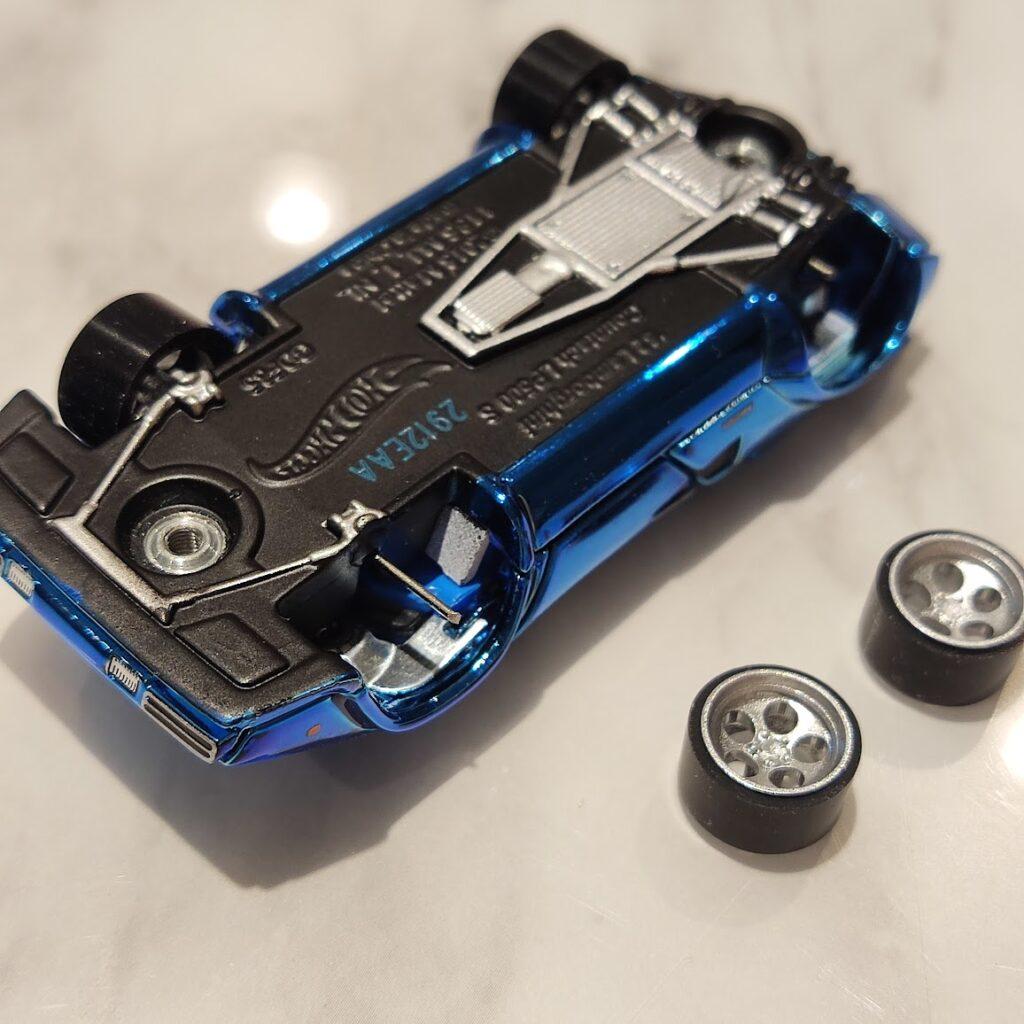
Once the original wheels are off the car, slide in the new wheel and axle assembly through the car. The new axles provided are very close in original diameter to standard Hot Wheels axles, so the new axle should be able to rotate freely like the originals. Due to differences in cars and base widths, the new axles will require some trimming. Keep a visual note of how much axle you will need to trim off. It is recommended you trim enough to leave behind 4-5mm of axle sticking out the base so the other wheel can attach onto it.
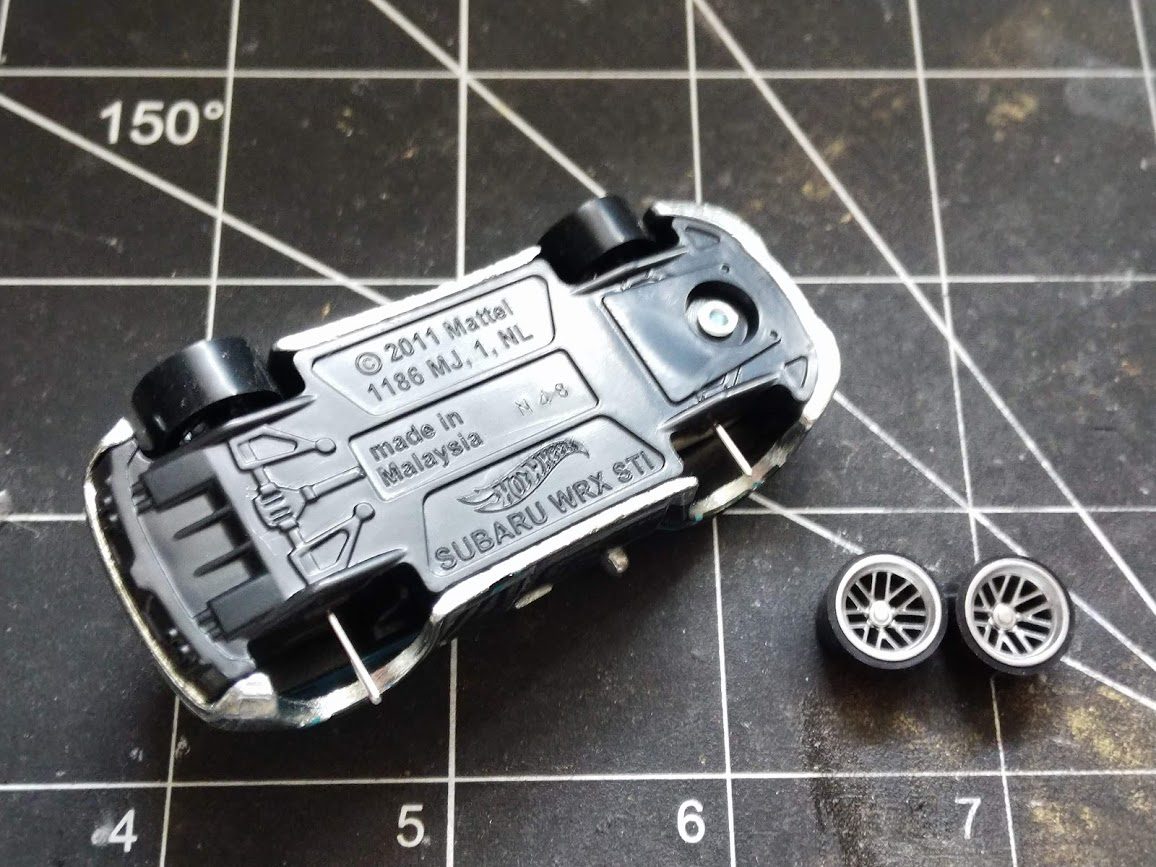
Remember less is more! Don’t trim too much otherwise you won’t leave enough axle for the other wheel to attach. You can always go back and trim later on, but not if you trim too much! We use our standard size cutting pliers to trim the axles. Once again eye protection is recommended as little bits of axle can shoot in your face while trimming them!
The image below is a good idea of how much axle you should be trimming and leaving behind!
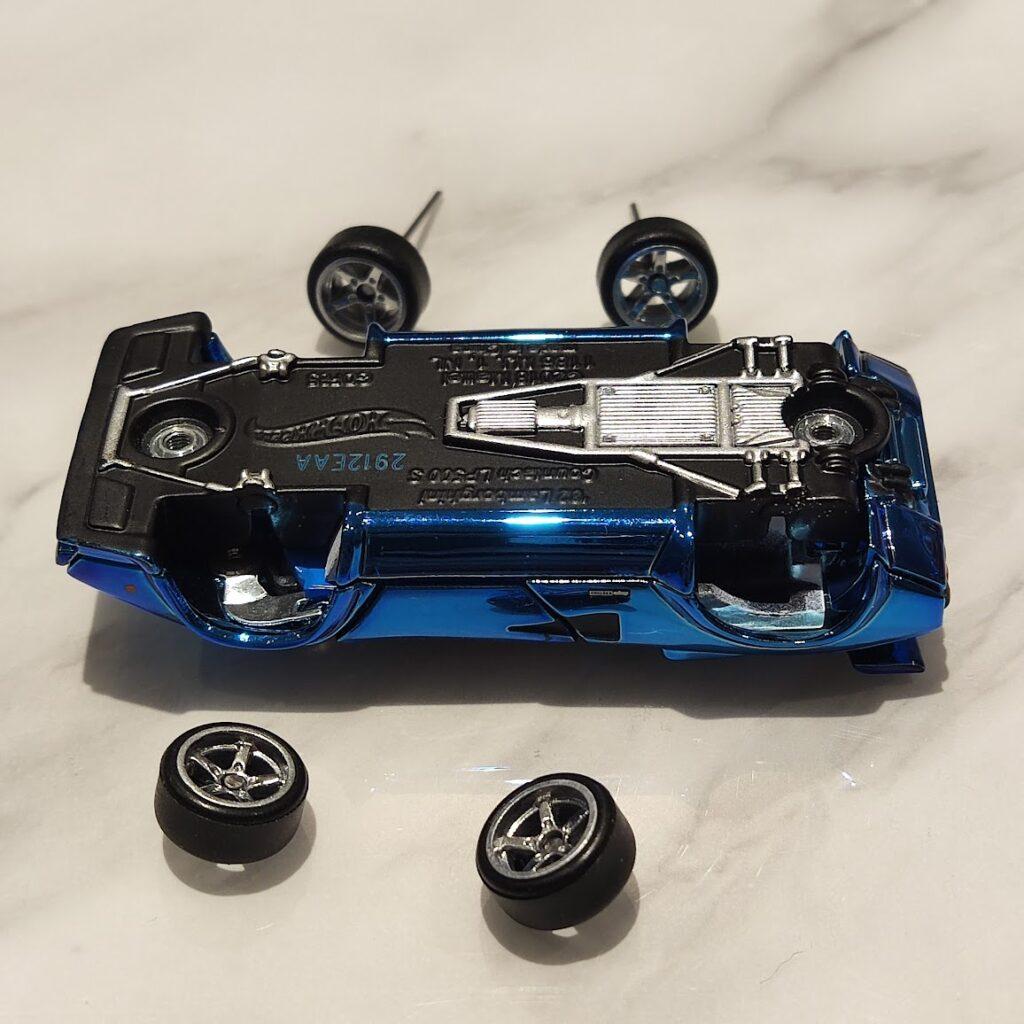
Once the trimming is done, attach the other wheels onto the axles! If the wheels are sticking too far out, trim the axles again as necessary. Use some glue on the axle end again before attaching the wheel if you wanted a more permanent fix. Remember not to use excessive force while attaching the wheels to the axle or you risk hurting yourself and/or breaking the wheels!

After that, your wheel swap is complete! Admire your hard work and make any little tweaks as necessary! Once you get the hang of these press-in axles, you can perform wheels swaps in little to no time. Our press-in axle system makes wheel swapping so easy we are sure even a monkey can do it! If the tires get dusty/dirty, use some tape to take them off.
That’s all folks! Thank you for referencing this wheel swap guide! Please contact us if you have any additional questions or concerns regarding the wheel swap process!
Below is a slideshow of the wheel swap process on the RLC Countach!